Media
Comms

Filters
Infrared-pass filter
Camera infrared-blocking filter
Infrared-pass filter
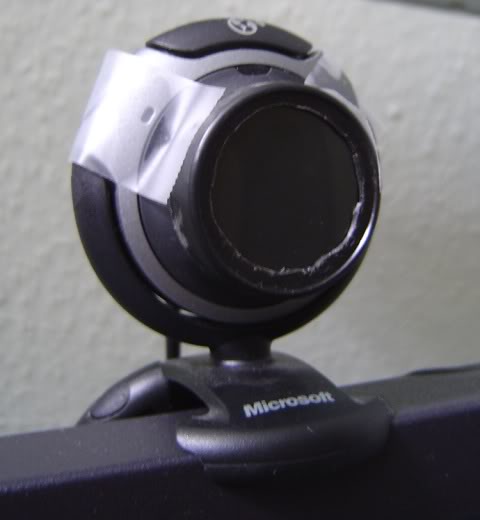 Filter over lens - wilderpilz
Tracking requires the point model to be completely isolated from all light, this can be done with software filtering using the camera's gain and exposure settings as well as the threshold slider in FreeTrack. However if complete isolation is still not possible, usually because of direct window light or other light sources in the background, a physical infrared-pass filter over the camera lens is required in combination with infrared lights.
In the case of filters that specify a cutoff wavelength, a higher cutoff blocks more visible light but should not exceed the wavelength of LEDs being used. Also, if the camera's infrared-blocking filter isn't removed a lower filter cutoff is preferred to avoid blocking too much near-infrared light.
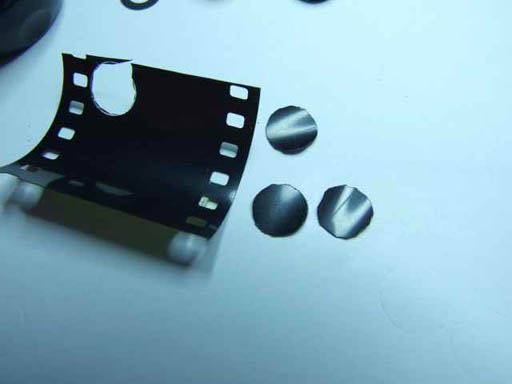
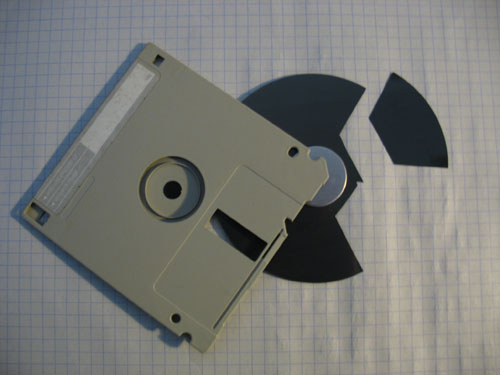
Infrared-pass filters are visible light blocking and appear black or very dark to the naked eye but are transparent to infrared sensitive cameras. Sources of infrared filters include:
- Fully exposed and developed photographic film - Three layers most effective.
- Dark gel filters - Roscolux. Combine colours to block visible light.
- Dark acrylic glass sheets - Plexiglas, Perspex etc.
- Infrared photography filters- eg 720nm, 850nm cutoff.
- Magnetic medium in floppy disks - Not ideal, very strong and filters some infrared.
Camera infrared-blocking filter
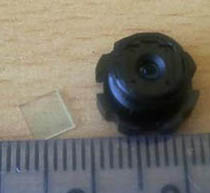 Removed filter square - tankbuster
Image sensors are very sensitive to infrared light so all conventional cameras have a built-in infrared blocking filter to prevent the image being washed out. Some infrared light can still penetrate and is usually enough for tracking purposes, though some filters can be quite strong and combined with background lighting, can make point isolation difficult. This can be addressed by removing the filter, making the camera more sensitive to infrared light and tracking more reliable in all lighting conditions. Removal may be required for tracking reflective material which is not as bright as LED lights.
The most common filter is a small square with a blue tint and red reflection which is easy to remove and later restore if required. If it is glued in place, it may be easier or even necessary to break it free, this should be done with great care so as not to scratch any lenses. If the filter is damaged it will permanently render the camera sensitive to infrared light and unable to produce a normal colour image.
In rare cases the filter is attached to the image sensor making it difficult to remove without damaging the delicate sensor. The filter may also be in the form of a film coating on one of the lenses which can only be removed by carefully polishing or dissolving it off. The camera compatibility list includes reports of filter removal difficulty.
By dismantling the camera you also have an opportunity to install an infrared-pass filter internally for a cleaner appearance. Be sure to note the lens order and orientation when dismantling so you can later reassemble everything correctly.
Filter removal guides by FreeTrack users (contributions welcome):
Logitech Webcam C200 - SpecterM
Logitech Webcam C120 - nadrealista
Logitech QuickCam Connect - zaelu
Logitech QuickCam Express - Xotopl
Microsoft Lifecam VX-2000 - Alex Massey
Microsoft Lifecam VX-1000 - tankbuster
A4Tech PK 333MB - zaelu
A4Tech PK 335MB - Volans
Labtec Webcam Pro - Deimos
External guides:
Creative WebCam NX Pro - motenay
Updated by Kestrel Sep. 2011
Webmaster isn't responsible for FreeTrack - Firefox recommended - Disclaimer